
Sump Pump Repair in Nashville, TN: What Happens During a Service Visit
A sump pump repair visit in Nashville or Franklin typically runs through five phases: assessing the pit, diagnosing the specific failure, deciding between repair and replacement, sizing the fix correctly, and testing it under simulated flow before the technician leaves. The whole visit usually takes an hour or two for a straightforward repair, longer if replacement or discharge rerouting is needed. Here’s what actually happens at each stage, and what you can expect to see and hear along the way.
Before the Technician Arrives
A little prep helps the visit go faster: clear a path to the sump pit if it’s in a storage area, note when the problem started and any specific sounds or symptoms (constant running, silence during a storm, water rising despite the pump running), and if safely possible, avoid running additional water into the system until the technician has assessed it.
Phase 1: Sump Pit Assessment
The technician starts by examining the pit itself — its size, condition, and whether the drainage inlet is adequate for the volume of water the property typically sees. This is a visual and physical inspection: checking for cracks, sediment buildup, or a pit that’s simply undersized for the home’s groundwater conditions. You’ll likely see the technician remove the pump temporarily to get a clear look at the pit’s bottom and walls.
Phase 2: Pump Diagnosis
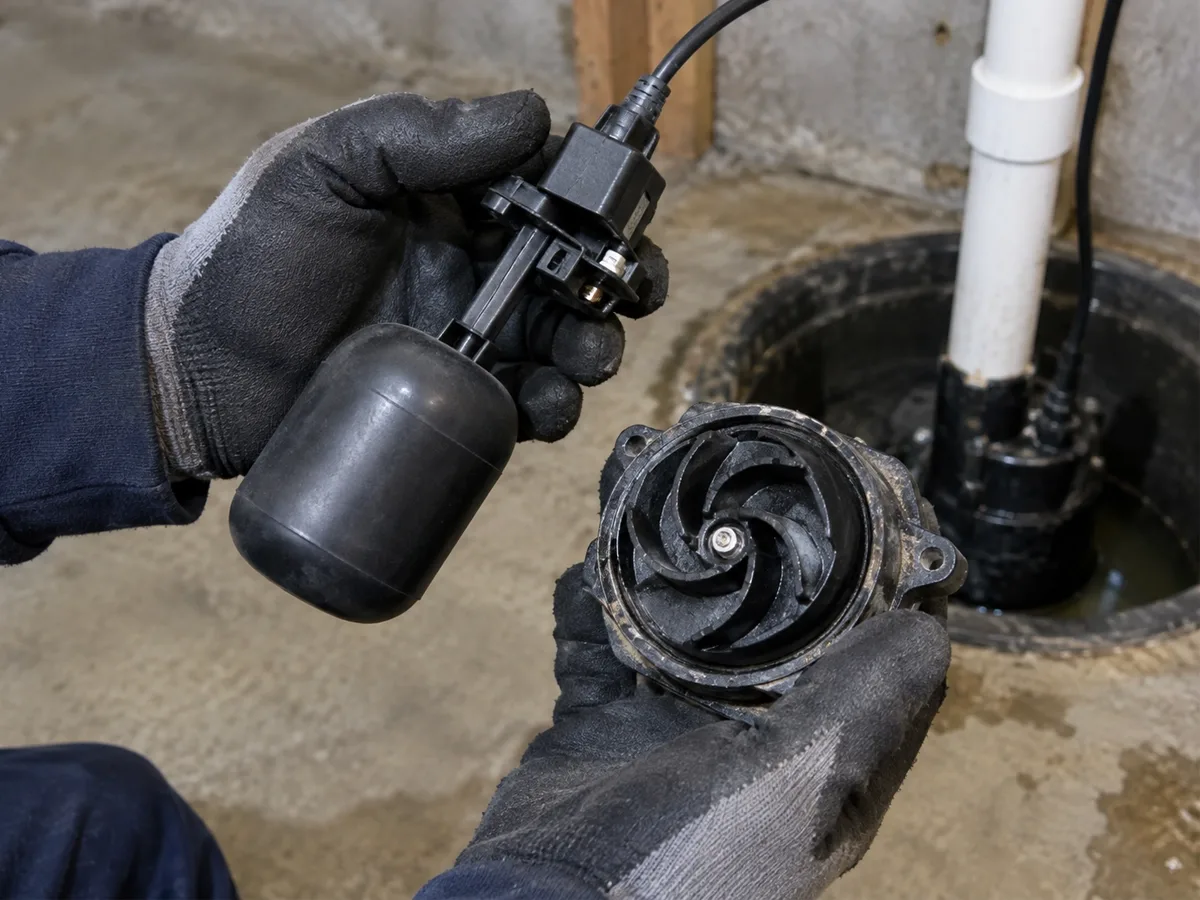
Next comes a component-by-component check: the float mechanism (which triggers the pump on and off based on water level), the impeller (the spinning part that actually moves water), the check valve (which prevents water from flowing back into the pit after being pumped out), and the discharge line itself. A stuck float, a jammed or worn impeller, and a failed check valve are three of the most common individual failure points, and this phase is where the technician isolates which one — or which combination — is actually causing the problem you called about.
A good question to ask during this phase: “Which specific component is failing, and why?” A technician who can point to the exact part — not just say “the pump is old” — is giving you a diagnosis you can actually verify, not a guess.
Phase 3: Method Selection — Repair, Replace, or Upgrade
With the diagnosis confirmed, the technician recommends repair, full replacement, or an upgrade to a higher-capacity system if the current pump was undersized for the property’s actual water volume. This is also where cost gets discussed directly — a repair addressing a single failed component costs meaningfully less than a full replacement, and a legitimate technician will explain why one makes more sense than the other for your specific situation rather than defaulting to the more expensive option.
Phase 4: Proper Sizing and Code-Compliant Discharge Routing
If a component or the whole pump is being replaced, correct sizing matters more than most homeowners realize — a pump sized for gallons-per-hour (GPH) below what the pit actually receives will run constantly and fail early, while an oversized pump can short-cycle. Discharge routing is the other detail worth watching closely: in Nashville specifically, Metro Nashville code prohibits tying a sump pump discharge into the sanitary sewer, a violation that’s more common than homeowners expect from non-specialist installers. Discharge should route to daylight or an approved storm drain instead — worth confirming directly if you’re unsure what your current system does.
Phase 5: Testing Under Simulated Flow
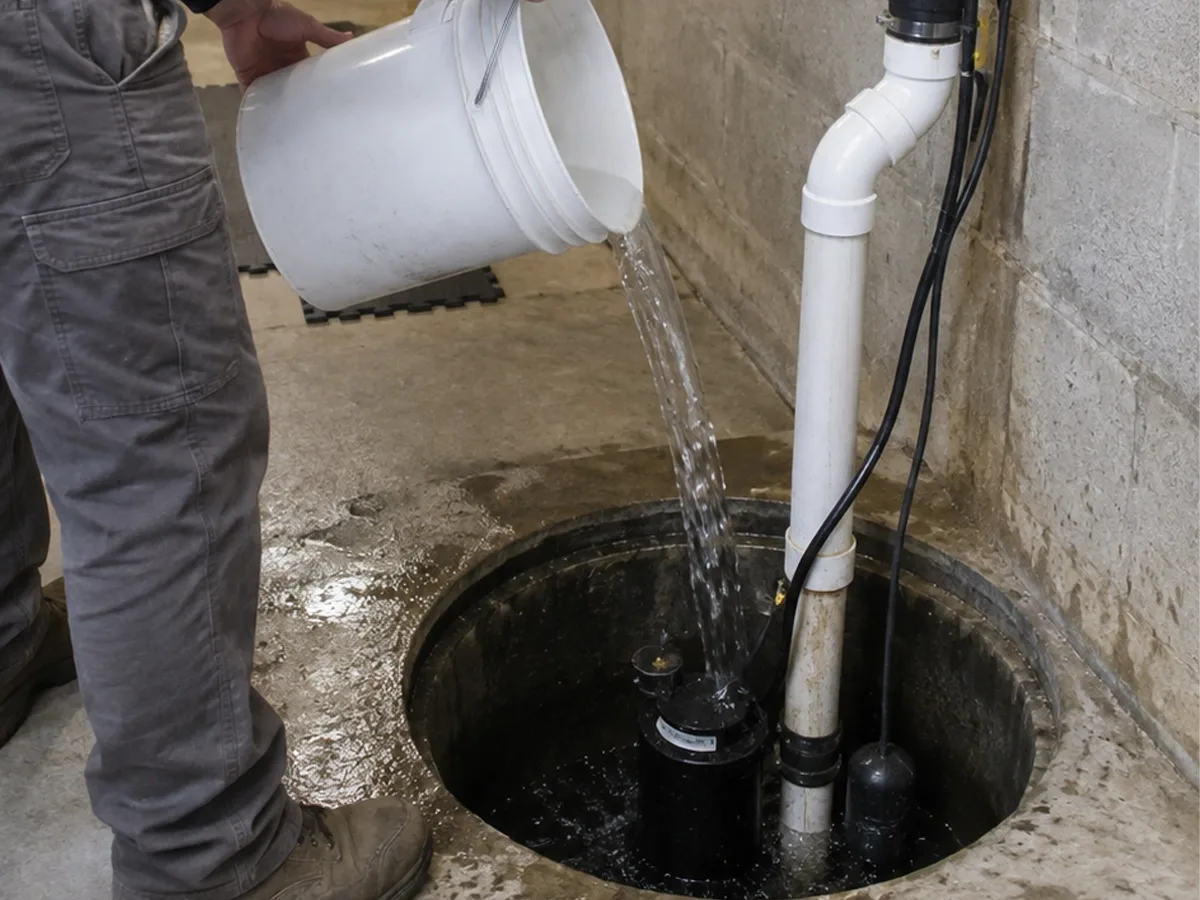
The visit doesn’t end when the repair is physically complete — a proper technician tests the fix by simulating actual flow, typically pouring water directly into the pit to confirm the float triggers at the right level and the pump cycles correctly under real conditions, not just that it turns on when plugged in. This is the step that catches a repair that looks fine on the bench but doesn’t actually respond correctly to rising water.
After the Visit
A thorough technician will walk you through basic ongoing maintenance before leaving — testing the pump periodically yourself, clearing debris from the pit, and knowing the signs that mean it’s time to call again. Given that mold can begin developing on wet materials within 24 to 48 hours of water exposure, and that water damage and freezing account for roughly 1 in 60 homeowners insurance claims annually, a properly tested repair before you leave is what actually prevents the next visit from being an emergency call.
Frequently Asked Questions
How long does a typical sump pump repair visit take?
A straightforward repair addressing a single component usually takes an hour or two. Replacement, or a job requiring discharge line rerouting for code compliance, can take longer depending on complexity.
Will the technician test the repair before leaving?
A proper repair visit includes testing under simulated flow — pouring water into the pit to confirm the float and pump respond correctly — rather than just confirming the pump powers on.
What if my discharge line isn’t routed correctly?
If your sump pump discharges into the sanitary sewer rather than to daylight or an approved storm drain, this is typically flagged and corrected as part of the repair, since it’s a Metro Nashville code violation regardless of whether it caused your original problem.
Should I be present during the whole visit?
It’s not required, but being available to answer questions about when the problem started and any unusual symptoms helps the diagnosis phase move faster, and being present for the final test gives you direct confirmation the repair actually works.
A sump pump repair visit isn’t just swapping a part — it’s a diagnostic process that should end with a tested, correctly sized, code-compliant system, not just a pump that turns on. Knowing what each phase should look like is what lets you tell a thorough repair from a rushed one.
Prodigy: Sump Pump Repair Done Right in Nashville: Prodigy technicians diagnose, size, and repair sump pump systems to Metro Nashville code, with proper GPH sizing and discharge routing every time — not a one-size-fits-all swap. Contact us today for a free estimate before your next storm.
Ready to Schedule Your Sump Pump Repair Visit?
Prodigy diagnoses the actual failure point and routes discharge to code — no guesswork, no shortcuts.